Whether you are thinking about selling MacBook Air or erasing data from the same for security reasons or wanting to reset it with a fresh installation, and then follow the tutorial. Here we have provided the best method to resolve how to remove all data from MacBook Air.
You might need to reset your MacBook or thinking about to sell it or passing it to someone else. A factory reset will remove all data from MacBook Air and take the system back to the state when it was new.
Factory Reset, both automatic and manual is a process of wiping the entire data, settings, and apps on MacBook Air/Pro and restoring it to the original factory settings. The method of executing the factory reset (manual or automatic) depends on the time duration of MacBook usage and the operating system of macOS.
Mac OS Monterey or the later versions and Macs with Apple Silicon or the Apple T2 Security Chip can be automatically reset to factory settings because they has “Erase all content & settings” option.
However, devices compatible with macOS Big Sur and earlier versions should be reset manually that involves the series of steps including entering macOS recovery mode, resinstalling macOS, and erasing the disk.
How to Automatically Factory Reset MacBook?
Factory reset is possible on a MacBook running macOS Monterey and later versions. Go through the steps discussed to do the same –
macOS Ventura
1. Navigate to Apple menu and click System Settings.
2. Tap General option appearing in the sidebar.
3. Choose Transfer or Reset on the right.
4. Go to “Erase all content and Settings”.
macOS Monterey
1. Navigate to Apple Menu and then System Settings.
2. From System Preferences, choose Erase all Content and Settings.
After clicking the option “Erase all Content & Settings”, follow the instructions mentioned to continue resetting macOS Ventura and macOS Monterey devices to factory settings:
1. A prompt will appear, sign-in with a password that you used earlier to login Mac and click OK.
2. Backup your Mac by using Time Machine and an external storage device if asked.
3. Tap Continue to remove the settings, data, media, and other items.
4. Enter Apple ID to sign out Apple ID and tap Continue.
5. Click “Erase all content & settings” to continue.
6. The Mac will restart and you will encounter a black screen or a progress bar. You might also need to reconnect Mac to Bluetooth accessories such as keyboard or mouse by turning accessory on.
7. Mac will ask to select required Wi-Fi network or attach a network cable. Use the Wi-Fi menu to select a network.
8. Mac will activate and click Restart.
9. Once restart completes, go through the setup assistance instructions to configure Mac like you applied for the first time.
How to Quickly remove all Data from MacBook Air?
The instant and quick way to remove all data from MacBook Air is MacMister Data Wipe for Mac application. The software offers Add File(s)/Add Folder options with the help of you can load the files that you do not need and remove the data permanently from the system. It is designed with an intuitive environment, thus all professional and non-professional users can perform the process effortlessly. Additionally, the three-step process will help users accomplishing the entire task in minimum time.
Moreover, the software is designed with many features such as wiping methods and data filtering with the help of users can remove all data from MacBook Air according to the requirements. Even, you may download the free demo edition of the tool on any macOS to understand the software steps in detail for free.
Working Steps to remove all Data from MacBook Air
Step 1. Download and run MacMister Data Wipe for Mac on any macOS.

Step 2. Use Add File(s)/Add Folder options to add required files/folder on the software for data erasure. Click Next.

Step 3. The software now starts listing all the chosen files on its panel. Verify them and click Next.

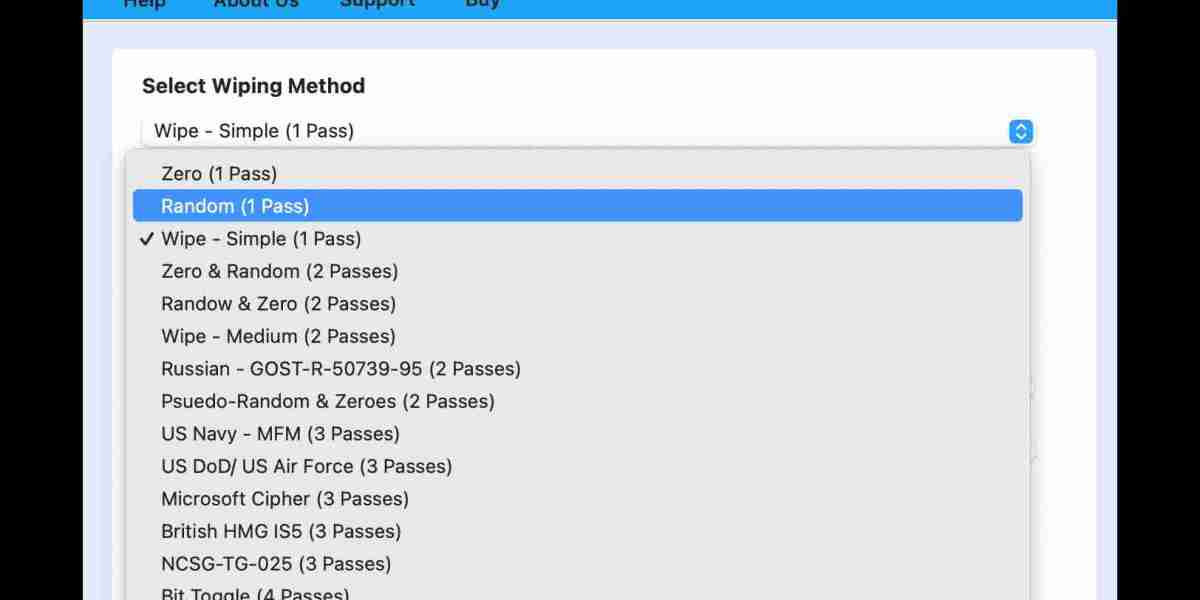
Step 4. Now, click the Wiping Method drop-down to pick the necessary wiping option.

Step 5. Apply the required data filtering and click Wipe button.

Step 6. The Live Wiping Progress screen will appear that displays the live wiping process of selected files.

In few seconds, the tool will complete the process and a confirmation message will appear on the screen. Click OK button to close the message.
Conclusion
The write-up here provided multiple approaches to fix how to remove all data from MacBook Air. We have discussed the manual method and automated solution. The manual method is free to use but requires technical knowledge. The direct solution is cost-effective and safe. Any user can use it and perform the process without trouble. It also has free demo that help users analyzing the entire task for free.